Choosing the right compound bow can be a little daunting. You don’t want to get the wrong one for the type of archery you’re going to be doing, and there are some key differences between bowhunting and target shooting. We’ve provided this guide as a primer to take some of the mystery out of compound bow shopping and help you make your selection with a little more confidence.
What is the difference between a recurve bow and a compound bow?
A recurve bow is a traditional bow that is somewhat different than a longbow and very different than a compound bow. Recurve bows have the same basic design as a longbow, but they’re typically shorter with the limbs curving away from the archer at the tips. This makes them easier to use than longbows when shooting from horseback or in tight brush.
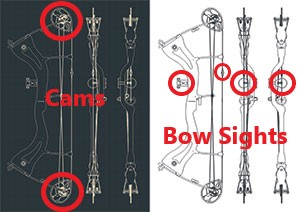
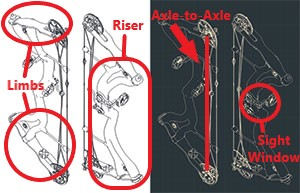
A compound bow is more powerful than a recurve bow due to the pulleys called the “cam system” at the end of the limbs, which make drawing and holding the bowstring at full draw much easier. When held at full draw, the difference between the holding weight (lighter) and draw weight (heavier) is called “let-off”. If you have a 40-pound draw weight and a 75% let-off, then at full draw it would be a 10-pound draw. Essentially, this means that the power of the bow is not impacted but holding the string back is much, much easier. This is a key difference between compound bows and recurve bows. Once you have full draw on a compound bow, it’s quite easy to maintain that full draw without strain due to the let-off. With a recurve bow, there are no cams to assist, so a 40-pound draw weight will more quickly tire out your arms and back muscles.
These elements make recurve bows better for quick follow-up shots than compound bows, but they’ll have lower overall draw weights and energy, generally speaking. Compound bows also feature sight systems, typically using a front pin sight mounted to the main body of the bow, called a “riser”. Within the riser, above the grip, is an area called the sight window, where the pin sight is mounted. The rear sight is called a “peep sight”, which is a small aperture tied into the bowstring itself. It isn’t common to see recurve bows with sighting systems like this. Instead, if a sight is used (usually in competition), it is mounted in the sight window, but there is no peep sight. Most of the time you’ll see recurve archers going “barebow”: no sights, stabilizers, or other modern attachments. Barebow is the most primitive type of archery, practiced for the extra challenge presented by forgoing modern technological developments.
What are the best bows for hunting?
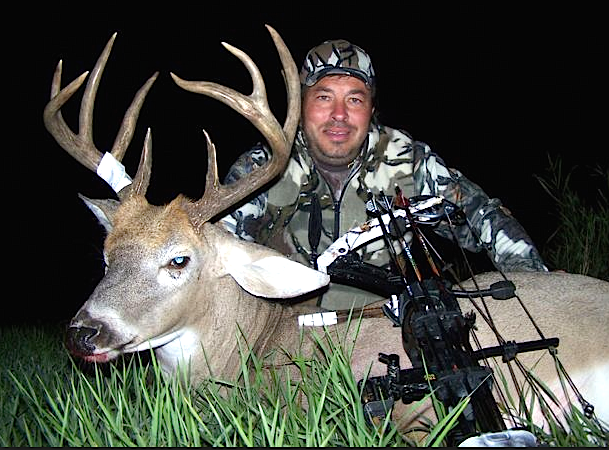
You may run across someone hunting with a recurve bow, but it’s far more common to see bowhunters using compound bows due to the ease of use and increase in power. With the additional power, easy let-off, and sights, it’s much easier to hunt. This is because you can take the time to line up your shot, and be assured that the arrow will travel with more speed and power, ensuring an ethical kill.
Recurve bowhunters come in two basic types: those who have never used another kind of bow or those who are very skilled at bowhunting and want to increase the challenge. The first type of recurve bowhunter likely grew up with a recurve bow and is most comfortable with them, or simply can’t afford a compound bow. The second type of recurve bowhunter has more in common with compound bowhunters: bowhunting in any form presents more challenges than hunting with a firearm that has far more power, range, and margin for error if shot placement is a little off. A bowhunter that converts from a compound bow to a recurve bow is looking to make it even more challenging, using the primitive methods that our forefathers used to put meat on the table.
How do I choose my first bow?
The very first thing to figure out is your dominant eye. Most people’s dominant eye corresponds to their dominant hand, right to right and left to left. However, this is not always a given, and plenty of people have a dominant left eye and dominant right hand, or vice versa (up to 33% of people are left-eye dominant, but only about 10% of people are left-handed).
Figuring out your dominant eye is very easy. Put both of your hands together and make a triangle with your thumbs and index fingers (as pictured). Look through this hand-triangle at a distant object, even 10 feet will work well. Focus on the object with both eyes open, then close your right eye. If the object jumps out of view, you’re right eye dominant. If the object stays in place, you’re left eye dominant. Try it again but close your left eye to double-check.
If the object doesn’t jump at all from both eyes open to one eye closed, congratulations! You’re one of the very, very few people out there who doesn’t have one eye dominant over the other (like ambidextrousness, but for your peepers). You are also one of the few who gets to pick a bow solely based on your dominant hand.
The rest of us will base our bow-handedness on our dominant eye. If you’re right-eye dominant, you’ll be shooting right-handed, and if you’re left-eye dominant, you’ll be shooting lefty. Again, this is all about the dominant eye, not the dominant hand. To clear up one other bit of business, if you’re shooting righty, then you’re holding the bow in your left hand and drawing the bowstring with your right. Lefty-eyed archers will hold the bow in their right hand.
How do you figure out what size bow you need?
Start With Draw Weight
This can vary anywhere in poundage from 10-15lbs for a small child, all the way up to 65-75lbs for a large adult. This is going to depend entirely on the strength of the archer and take into account things that might affect that, like previous surgeries or injuries.
What is the best draw weight for a compound bow?
A 40-pound bow is a good middle-ground for most adults and is usually the minimum draw weight required for bowhunting in most states. If you are buying for bowhunting, be sure to check your local hunting regulations before buying a bow. This is also a good draw weight for target shooting, although some target archers will go for a lower weight to avoid fatigue.
The good news is that compound bows are usually made to have an adjustable draw weight range, so you can take it to an archery shop to have it increased or decreased, just not in huge ranges like 10lbs up to 75lbs.
Determine Draw Length
Draw length is generally easier to determine than draw weight and is based on the archer’s physical upper-body dimensions. Your approximate draw length is measured by taking your full wingspan (arms outstretched and going from fingertip to fingertip) and dividing that by 2.5. This refers to the distance between the grip and the string when at a full draw.
On a compound bow, the draw length can be adjusted by a qualified professional using specialized equipment like a bow press. Some bows have an adjustable draw length system that doesn’t require a bow press, but it’s still helpful to consult a professional while you’re still a beginner.
Axle-To-Axle Length
This measurement is the distance between the bow’s cams. The biggest factors in this measurement are that the shorter ones are more maneuverable in tight quarters like a treestand or hunting blind. Longer ones typically make for longer shots, so can be better for target shooting or wide, open spaces.
What kind of compound bow is best for a beginner?
There really isn’t a one-size-fits-all compound bow. You have to take into account the beginner’s physical size and strength and their primary intended use for the bow. For kids, many of the beginner’s bows on the market will have very low draw weights and short draw lengths to accommodate a smaller frame. Like pretty much anything, a kid will eventually outgrow it and need to go up a size or two. Also, those low draw weights probably won’t be legal for hunting, but if you have an aspiring bowhunter, all of the practice with a beginner’s model will pay off and you can gradually work them up to a 40-pounder.
About the Author: Dave P.
Dave grew up in the southeast highlands of Idaho on the western slope of the Rocky Mountains. He was strongly influenced by his dad, a lifelong outdoorsman who brought him along on hunting trips. He began shooting .22’s at age six under close supervision. At 13 he got his first deer rifle and first mule deer in the same month. The next year he got his first shotgun and first ruffed grouse. He’s often roaming the Portneuf Range and Caribou-Targhee National Forest camping and hunting game to fill the freezer. He has a Bachelor of Science degree in Outdoor Education & Writing from Idaho State University and has had many jobs in the outdoor industry
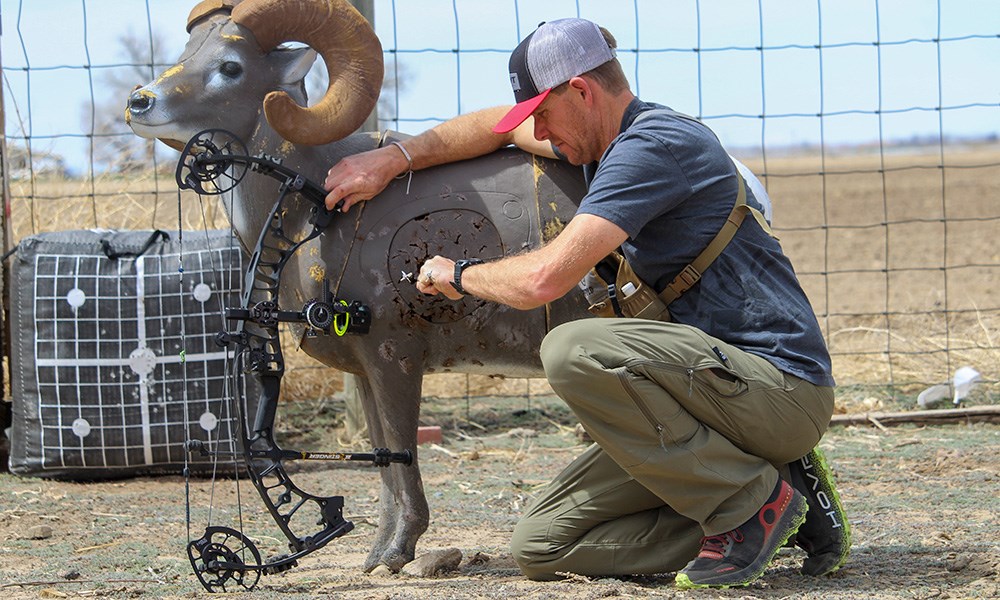
Creating a deadly silent bow may provide an edge when you need one by eliminating noise, vibration, adding stability to arrows and more.
Creating a deadly-quiet bowhunting outfit makes you a deadlier predator.
It’s true that the modern compound bow is quieter than ever right out of the box. It’s also true you’ll never hear a bowhunter complain about his whitetail setup being too quiet. Outside Africa, where animals live in constant fear of sudden death from big cats, whitetailed deer are the jumpiest critters bowhunters regularly pursue.
This, of course, includes regional qualifiers.
The public-lands mountain whitetails I bowhunt in the Northwest (largely because of wolves and mountain lions) are the jumpiest I’ve bowhunted anywhere. Those I periodically pursue in Kansas, living with no large predators and hunted lightly, are tame by comparison. You’ll also find individuals at both ends of this spectrum within a herd — one buck standing and taking it like a man even after sensing your presence, another beneath the same stand coming unglued at the thump of the quietest bow. This often depends on factors such as the proximity of the shot (the closer the animal, the more apt it is to react), how practiced your shot timing is (deer unaware of your presence always make the best targets) or recent encounters with bowhunters (missed shots across the fence days earlier).
Yet there’s no way around the fact that assembling a whisper-quiet bowhunting outfit means you start the game at a huge advantage. Here’s a five-step approach to assure your bow fits into that category.
WATCH: HOW TO CHOOSE ARROWS FOR BOWHUNTING
The Big Picture There are several inherent truths as directly applied to shot noise. First, super radical speed bows are seldom as quiet as “slower,” more forgiving models. I put slower in quotes because many fixate on that factor without understanding speed always comes at a price. Slower might indicate giving up 15 to 20 fps IBO. More practically, it might indicate shooting an average 280 fps real-speed bow instead of a barn- burning bow spitting arrows to 300 fps real speed (those numbers are offered to avoid inflated IBO ratings).
An undeniable reality is the fastest — and shortest — bows are more difficult to shoot well (especially when that book buck saunters beneath your stand and your heart’s fluttering) because of lower brace height. They’re also less comfortable to draw with cold, stiff muscles because of aggressive cams, and you have more time pulling through peak draw and sudden let-off valleys. Low brace means arrows spend more time on the string — more time to introduce human error when pulses redline. So, as an example, when choosing a whitetail bow — let’s say one from Bear Archery Products — I’ll make mine a Method (6.75-inch brace, 33-inch axle-to-axle and IBO 340 fps) instead of a Motive 6 (6-inch brace, 32 inches, 350 fps IBO).
More pointed, the arrows you choose have much to do with the decibel levels a bow produces after release. Simply put, a heavier shaft — 9 to 11 grains per inch (gpi) — more efficiently absorbs energy transferred by the bowstring than a lighter speed shaft (6.5 to 8.5 gpi) — resulting in less shot noise. Lighter- speed shafts absorb less of a bow’s energy, the remainder resulting in escape energies translating directly into vibrations, buzzes and twangs, creating shot noise to which deer easily react. Heavier arrows make for quieter shots, added reliability and penetration, and less influence from side-winds or light deflections.
Few whitetails are shot past 35 yards (25 yards, in reality). You don’t need blazing speed for success at such ranges, and don’t fall for the wives’ tale of beating a whitetail to the jump with blazing speed. Sound travels three to four times faster than the fastest compound.
Don’t be turned off by the smaller diameter as a hunting arrow. These “skinny” arrows fly great and hit hard. As with any accessory with your bow, everything should work together for quiet, consistent efficiency to get the optimal results.
String Things Many top bow models now include string-capturing devices or string bumpers that tame the inherent twang of bowstrings automatically. It’s a great innovation, not only making these bows quieter but also more accurate by initiating positive nock separation. That said, even bows with such silencers can be made quieter by installing standard string silencers.
There’s no shortage of options. Solid-molded models such as LimbSaver Super String Leeches (installed between string strands) or BowJax (slipped over the string) are simple, deadly effective and impervious to weather but require a bow press for installation.
Remember, too, anything placed between string strands can influence peep rotation, so install them before final tuning. Rubber Cat Whiskers, like originals from Rancho Safari, are waterproof and quick to install (secure with an overhand knot) — a standby still popular decades after their invention. Poly-yarn Puffs from E.W. Bateman, sometimes shunned in areas with abundant burrs but otherwise a super silencing alternative, provide another great option. They stop string noise, hold little moisture and are the lightest of these choices, so they won’t negatively affect arrow speed.
No matter your string-silencing choice, attach them 2 to 3 inches from where string and cam meet for optimum performance. Securing silencers toward the middle of the string erodes speed without significantly adding silencing qualities.
Another area often overlooked when adding string silencers are buss cables. Today’s compound bows, especially those including pre-loaded limbs, are strung tighter than ever. This means they can create small pings upon release. Such noise is easily squelched by applying half sections of Cat Whiskers to each cable length.
String dampers, LimbSavers, moleskin, rubber ‘cat whiskers’ and other accessories can help you tame noise and vibration on your bow. (Photo: Dan Schmidt)
Tame The Riser Many whitetail hunters forgo stabilizers because they’re viewed as unnecessary for close-range shooting, or because they can get in the way in tight confines — like inside a pop-up blind — or while pulling a bow into a tree via pull-up rope. Although such inconveniences are possible, they’re more than compensated for by the vibration- absorbing qualities of today’s active stabilizers. By active I mean models with special construction or materials actively absorbing unwanted shot vibrations and noise that can alert wary deer and shorten equipment life.
Picture models with rubber joints (Doinker Multi-Rod Hunter or FUSE Stabilizers), shifting silicone fill (Hi-Tek Sports), oscillating weights suspended in rubberized polymers or molded, soft rubber materials with multiple oscillating fins (NAP Apache), and you’ll get an accurate picture.
All soak up vibrations from any bow. When possible, test-fire several models before making a purchase, as there’s normally one design that will silence best combined with your bow and arrow combination. And don’t discount longer target models (9- to 12-inch), as they also add shooting forgiveness during stressful shots. Too, understand balance is paramount to top-notch shoot- ing, so choose models coaxing bows to sit level at full draw. Sometimes this means adding a shorter model behind the riser (Doinker’s 2-inch Chubby Hunter or FUSE Axium Pro 2-inch), as well as a 5- to 7-inch forward-situated stabilizer, or offset designs made to compensate for side torque created by quivers or sights (FUSE Sidekick, Xtreme Hardcore XR10 Carbon).
Silence of the Limbs When I discovered Sims LimbSavers at a sport show long ago, I was immediately convinced I’d found another product designed only to extract hard-earned cash from bowhunters’ wallets. Boy was I wrong. Owner/inventor Steve Sims quickly changed my mind by inviting me to strike two aluminum baseball bats against a concrete floor; one without LimbSaver, one with NAVCOM rubber mushroom installed. The bat without LimbSaver rang like a bell and vibrated perceivably. The LimbSaver-equipped bat produced a dull thud and resonated no vibrations.
Releasing an arrow is an explosive event. Viewed in slow motion, bow strings and cables seem to turn to noodles, risers can sometimes be seen flexing slightly, accessories shimmy and limbs shake violently. Limb silencers help absorb excess vibrations and dissipate them silently. Since Sims Vibration Laboratories’ LimbSaver introduction, many companies have followed suit, including BowJax, PSE and BowTech.
Accessory Dampening Many savvy bowhunters invest the time necessary to make their bow as quiet as possible but neglect tack-on accessories such as sights, arrow rests and especially quivers. All are potential sources of irksome shot noise. After instillation, sight in and final fine tuning, it’s always wise to do a final inspection with Allen-wrench set in hand, checking every set screw, sight pin and bolt for snugness. It’s also smart to conduct such checks periodically, especially just before the season opener after a long summer of target practice, after a month of riding in an ATV rack or even one airline flight. A loose screw on, say, a sight aperture, can create rattle- snake buzzes, alerting game during season-making shots. If a particular screw works loose regularly after prolonged shooting, add Loctite to prevent it from backing out.
You might find a particular accessory creates hums or buzzes even when all screws are tight. I’ve owned sights — pendulums and movers in particular — that created slight tuning-fork hums on release. Drop-away rest arms often thwack riser shelves sharply upon release. Detachable quivers are also a common vibration culprit. You might simply wrap sight extensions and apertures, or quiver hoods, with thick rubber bands or add Mini LimbSavers to key points.
LimbSaver’s NAVCOM-rubber Bow Wrap is especially helpful for small jobs, cut into strips to wrap accessories with or into a small patch to create a drop-away rest-arm pad, super-glued into place. I find the best way to discover small buzzes and hums is to strum the bowstring aggressively, listening carefully for noise, placing an ear against suspect parts to better detect raucous spots and applying silencing material as necessary.
Tips and Tactics for Bowhunting Turkeys
by Jace Bauserman posted on February 21, 2022
I was hesitant to go after a springtime bird with archery tackle. After all, turkeys are intelligent, and when I call one in I want to smash it with a load of No. 5s. Sound familiar? Still, I love the stick-and-string game, and with archery-only turkey seasons offered in many states, I figured bowhunting would give me a head start on the action and help me escape the winter doldrums a little earlier.
You can hunt springtime birds using various tactics, and you won’t have to drop too many Benjamins on new gear if you’re already a bow hunter. Let’s dive in.
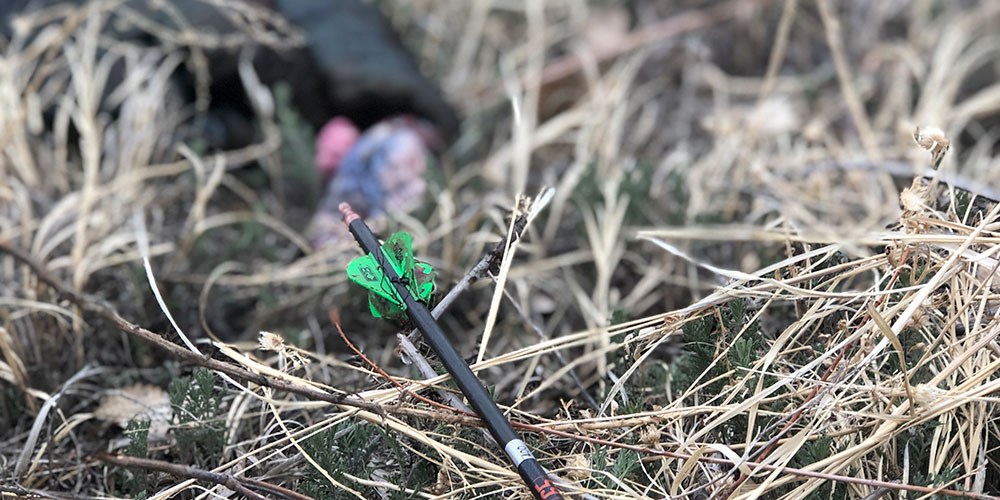
Archery Turkey Gear Your whitetail or Western big-game rig will work fine for turkey. One hint: drop your bow’s poundage. There’s no reason to test the limits of your shoulders when hunting birds. As for arrows, I wouldn’t spend a dime on any “for turkey” carbon or aluminum shafts. You may, however, want to consider a new broadhead. Fixed-blade broadheads are terrible for turkeys. These birds have a kill zone (in and around the wing-butt) smaller than the size of a softball. Heavy feathers make penetration an issue at times, but you need about 5 inches to get the job done. For this reason, I shoot a reliable 2-inch cut expandable. My go-to turkey broadheads are SEVR’s Titanium 2.0 and Rage’s Hypodermic Trypan NC.
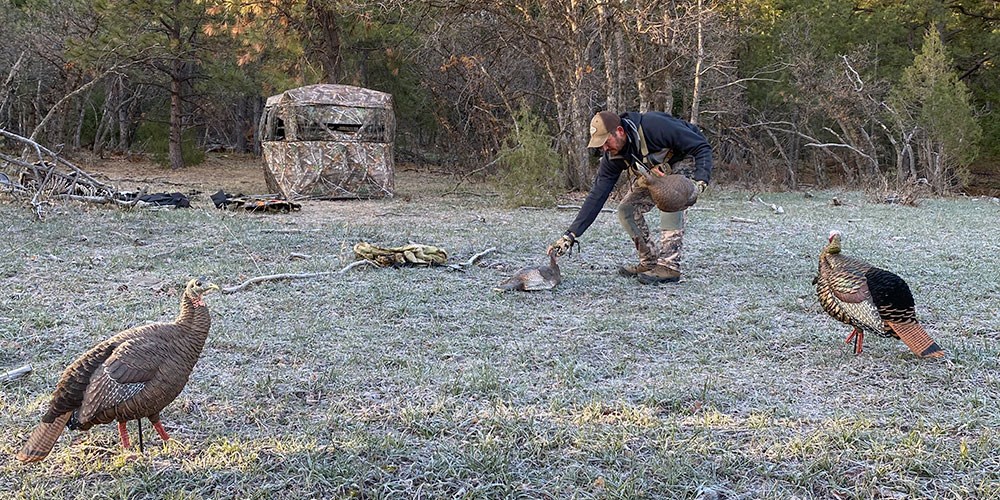
Chances are, if you’re a turkey junkie already, you have all the decoys you need. As long as they don’t look like uninflated footballs, they will work fine for archery forays. One decoy addition that’s a must-have in my book is the bow-mounted Stalker turkey from Ultimate Predator Gear. If you’re a run-and-gun lover, this cloth fake—which resembles a full-strut longbeard—attaches to your riser and has a shoot-through window. With this piece of gear mounted to your bow, you are the decoy.
If you don’t already own one, pick up a quality ground blind. For me, it doesn’t get much better than a Primos Double Bull or ALPS Deception Blind. Sit-and-wait hunting is one of the best tactics you can use when trying to skewer a springtime prize, and if you’re going to wait, you might as well do so in a ground fort that offers ample shooting room and comfort.
Top Tactics Don’t get too close to the roost. If you’re planning a field-edge set, which can be deadly early in the season when birds are still in wintertime flocks, spend more time scouting and less time hunting.
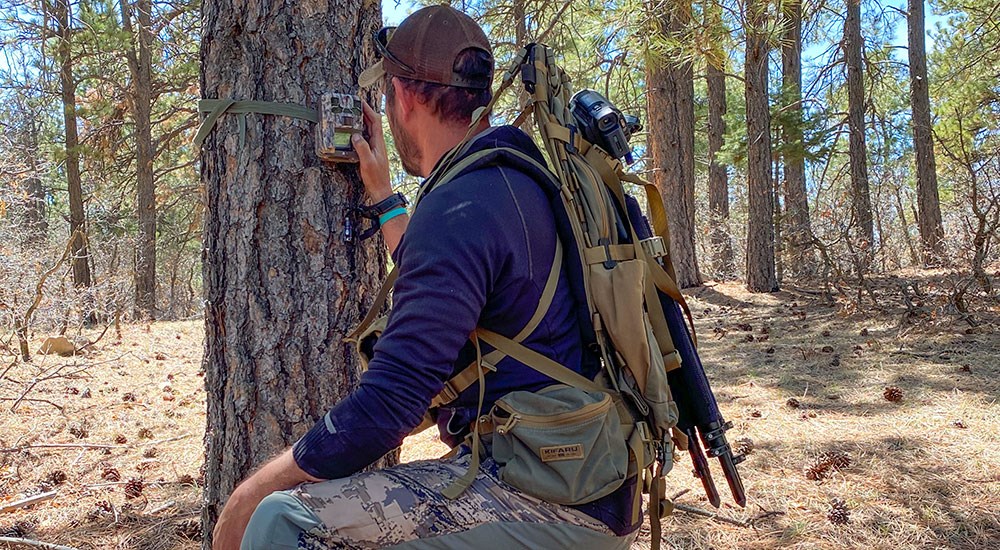
Set a trail camera or two and spend a few mornings watching the birds fly off the roost. Unless pressured, early-season birds are relatively predictable. The hens will scratch around in the timber, pop out on the field edge, and the toms will be in tow. Note the flock’s direction of travel and set up a ground blind 150 or 200 yards off the roost. Farther is fine if you know their travel pattern. Blend the blind in, but you don’t need to make it disappear. Set your decoys close, no farther than 12 yards. Remember, turkeys are small targets—the closer you can bring them, the better. As for decoy type and number, I like a full-strut tom over a laydown hen and a single feeding hen early in the season. Dave Smith fakes are tough to beat. If the birds are grouped up, don’t call too much. Morning toms will follow the girls. Let the birds come to you.
During the early part of the season, one of my favorite times to kill a bird is between 11 a.m. and 2 p.m. Most archery hunters have called it quits, and you’ll have the woods to yourself. Look for strut zones where boy birds like to drag their wings to show off for the girls, and areas in the timber where scratching is evident. If you can get where the birds want to be and let out soft, one- and two-note yelps now and then, you may fire up a lone bird or bring a group to you.
Those who want to roam the woods should attach a bow-mounted decoy and get after it. (These decoys are very lifelike, and as they are basically mounted to the hunter, should not be used on public-land tracts if shotgun seasons are open.) The tactic is simple: Attach the decoy to your bow and go looking for a fight. I get my best results when I find a few boy birds running together, or a longbeard or three guarding a few hens. A pair of 2-year-old birds are bullies if they are running together. Use cover to get within 150 yards of the birds, and if possible, try to show the birds only bits and pieces of the decoy. If the birds halt their approach or wander off course, move your bow’s riser to create movement. When it’s time to draw, do so in one fluid motion. I’ve shot three birds with this decoy, and all have been less than 10 yards away when the bow went off. It’s a serious rush.
All you need to do now is grab your bow and hit the woods.
Proper Bow Grip
by Jeff Johnston posted on July 31, 2019
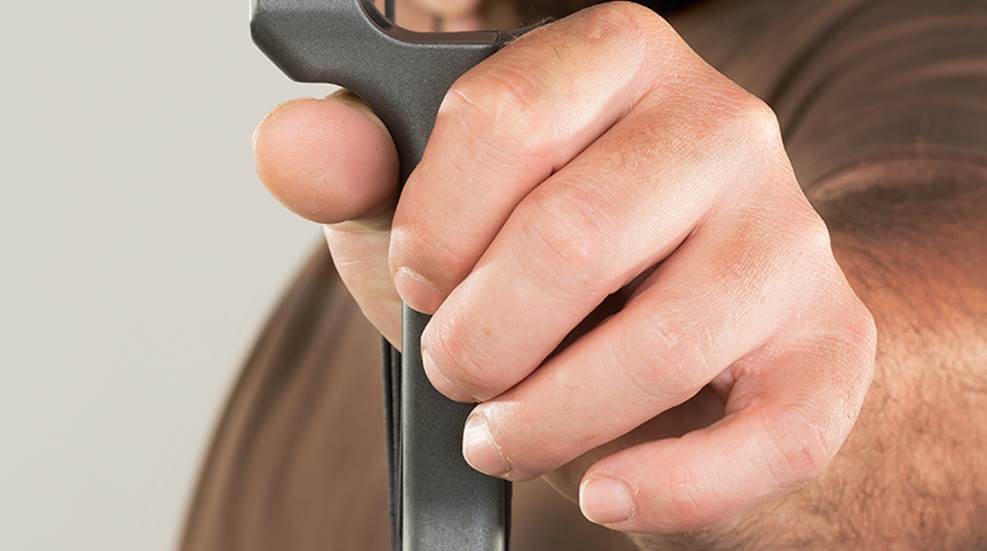
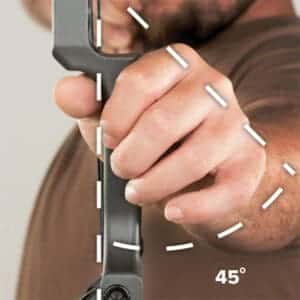
To practice the perfect grip, hold your grip arm (the left arm, for right-handed shooters) out with the thumb pointed straight up at the ceiling. Now rotate your wrist to the right until the thumb points at a 45-degree angle toward the ceiling. The knuckles of your hand should be aligned in a 45-degree angle as well. Cock your wrist up slightly—as if you were throttling a motorcycle—so the knuckles point toward the ceiling rather than the target.
Now imagine a line running from the deepest part of the “V” formed by your thumb and forefinger down to the center of your hand where it meets the wrist, in the seam between the two muscular pads that form the palm of your hand. Run the grip of the bow vertically along this line, with the throat, or the skinniest top portion of the grip, in the aforementioned “V.”
Place the index and middle fingers on the front edge of the riser and exert slight pressure to keep the bow in place while drawing. Your ring and pinky fingers should never touch the grip at all.
As you reach full draw, completely relax your hand. The bow will be held in place only by the rearward pressure of its draw force. Next rotate your hand toward the ceiling at the wrist so the knuckles point up and your palm points toward the target. Grip pressure will now be distributed evenly in the hand. The bow’s grip should barely touch the lower pad of the palm, if at all, but rather in the seam between the two pads. This is called a low grip, and is usually better for compound bows than a high grip used by traditional shooters.
Finally, wiggle your fingers to make sure they are relaxed, then let them hang naturally. The thumb should be relaxed but pointing toward the target parallel to the arrow. If your pointer and middle fingers touch the front of the grip slightly, that’s ok, but ideally they should hang a millimeter from it. The goal is to make as little contact as possible with the bow’s grip, thereby reducing grip-induced torque on the bow as the string is released.
A split second after the release, tighten your grip so the bow doesn’t fall from your hand. If you think you might drop it, consider using a bow sling, but with enough practice you’ll be able to do this without the need for a sling that could cause torque on its own. Practice this grip until it becomes second nature, even as a big buck walks in and turns broadside this fall.
Form Deep Dive: Grip Pressure
April 22, 2021 | Crispin Duenas
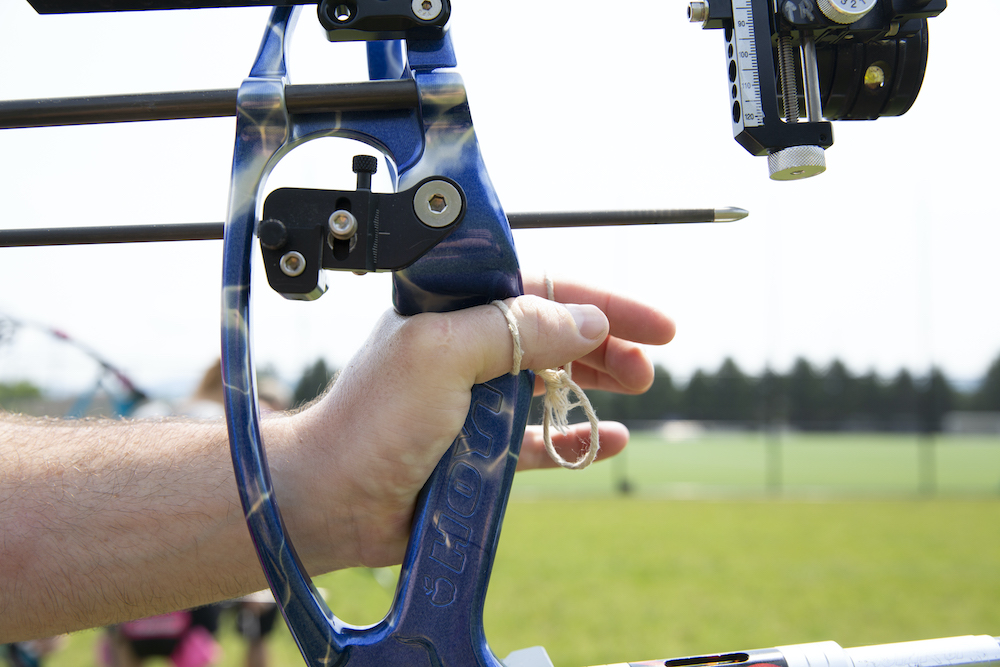
How you grip your bow can have an impact on where your arrow lands. Your bow hand is the only point of contact with the bow, and if you grip the bow inconsistently, your shot placement will be inconsistent as well. Bow grips come in many shapes and sizes, but regardless of the style you choose, being able to consistently place your hand on this grip is the key to successful shooting.
Your hand should be relaxed on the bow, with most of the pressure hitting midway between where your wrist connects to your palm and the V shape formed between your thumb and index finger.
You should choose the bow grip that’s most comfortable for you. It should promote a relaxed bow hand — this will come from pressure being properly distributed by the grip into the palm. The pressure point should generally be in the “meaty” part of the thumb pad. Most of the pressure should be felt about midway between where your wrist connects to your palm and the V shape formed between your thumb and index finger. This will vary slightly from archer to archer, but in general, this is a great starting point.
If your pressure point deviates from this position, you’ll start to see some errant shots on the target. “Heeling” the bow is a common problem where the archer pushes with the heel of the hand, moving the pressure point to the lowest point of contact on the grip. This usually makes the arrows hit high due to the offset pressure that is much below the throat (deepest part) of the grip. Conversely, putting too much pressure on the throat of the grip can produce a downward force that sends arrows low on the target. Arrows will go left or right if you change the pressure point by having too much tension in your fingers or your thumb.
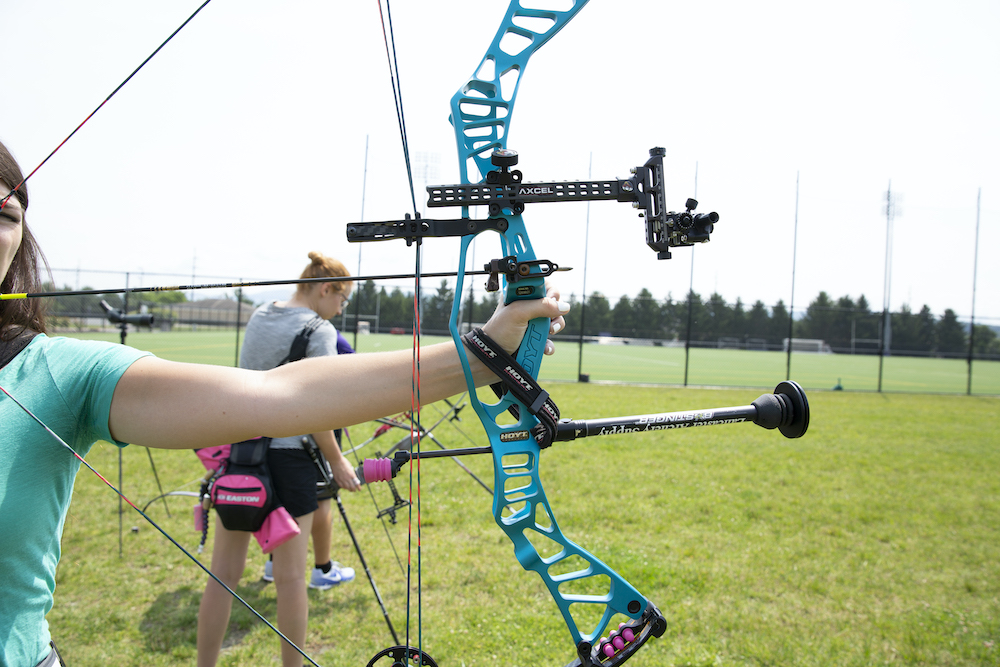
Your bow hand should stay relaxed, even after you release the arrow.
A good bow hand is a relaxed one that you can repeat for each shot. When the arrow is released from the bow, the bow hand should stay relaxed for as long as possible, which will allow the bow to propel the arrow forward without interference from the archer. The bow’s forward jump should be stopped only by the finger sling, not the archer’s fingers. This will ensure that the bow hand remains relaxed throughout the duration of the shot, and that because of the relaxed hand, proper grip pressure was maintained.
An easy way to tell whether or not your grip pressure is consistent (without looking at arrow placement) is to take note of how the bow is jumping out of your hand. Inconsistencies in the reaction of the bow will give you a good idea of how consistent your grip pressure is. Good coaching and video review – plus a ton of practice – will help you get it perfect.
Everyone’s body is built differently. So what does your build have to do with archery? Proper shooting form and good accuracy depend on having a bow that fits. When it comes to finding the right fit, one of the most important measurements is draw length.
Shooting a bow of the correct draw length helps maximize your potential as an archer because it gives you the best shot at proper form. A draw length that’s even an inch too long or short can cause problems ranging from decreased accuracy to injury. Draw length also determines the length of your arrows and can even affect the spine of the arrow you should be using. So, if you don’t have your draw length dialed in first, you’ll end up needing new arrows if you make a change.
Determining Your Bow’s Draw Length
Draw length is the distance you pull back the string for comfortable and proper shooting form. This measurement matters because compound bows have a mechanical stop that is set to a specific draw length. On a compound bow, the draw length is measured from the nocking point to the deepest part of the grip, and then add 1 3/4 inch.
A bow’s draw length is often indicated with its other specs somewhere on the equipment. But it’s always a good idea to measure just to confirm. The best way to do this is by taking it to a technician at an archery shop. They might use a draw board, which has measurements marked on the board and a system to draw the bow safely for an accurate measurement. Or they might use an arrow with measurements written on it.
Determining Your Draw Length
Finding a base for determining your draw length is pretty simple. All you need is a friend and a tape measure. Stand relaxed and raise your arms so you’re standing in a “T” position. Have your friend measure your wingspan from the tip of one middle finger, across your back, to the tip of your other middle finger. Then divide this number by 2.5. That number is a great starting point for knowing your draw length, but it’s important to fine-tune.
Shoot a bow set to that measured draw length to determine whether further adjustments are necessary. For example, if your bow arm elbow is bent at full draw, you may need a slightly longer draw length. If that elbow is hyperextended, the draw length probably needs to be shortened. At the correct length, your string should rest on the corner of your mouth and the tip of your nose while at full draw.
Adjusting the Bow
It’s important to know your draw length before purchasing a compound bow, particularly because a few models cannot be adjusted. And if the draw length is adjustable, you’ll often need a bow technician’s help, perhaps with a bow press and even new parts.
A compound bow’s cams determine the draw length. Most new bows on the market today have modular systems that are relatively easy to adjust with a series of draw-length-specific modules, or a single module with multiple settings. New modules aren’t too expensive and can often be purchased at an archery shop, where a technician can install and adjust them.
Some bows, particularly models designed for youth and beginning archers, feature highly adjustable cams that allow for a wide range of draw lengths and weights, so the bow “grows” with the archer. Adjustable cams don’t require new modules to make changes, or the use of a bow press. This simple process is great for beginners who are learning their perfect draw length because it allows them to play around and find the most comfortable fit. However, these bows generally don’t perform as well as more traditional compounds.
A few bows, especially some older models, have draw-length-specific cams. To make changes on them, a new cam with the right draw length must be installed. If you’re buying a used bow or get one as a hand-me-down, make sure it’s in your draw length. If it’s not, check with the manufacturer to see if cams are available in the right draw length and at a price you can afford. This process for changing cams requires a bow press and someone with experience working on bows.
If you’re new to archery, visit an archery shop. They’ll measure you and watch as you shoot to determine the best draw length for you. It’s also a great idea to take lessons from a certified archery instructor who can help you establish the right form in the beginning. This can prevent you from developing bad habits. Dialing in your draw length takes a few calculations and a little bit of practice to perfect, but once you’ve got your number you’ll be primed to shoot your best.
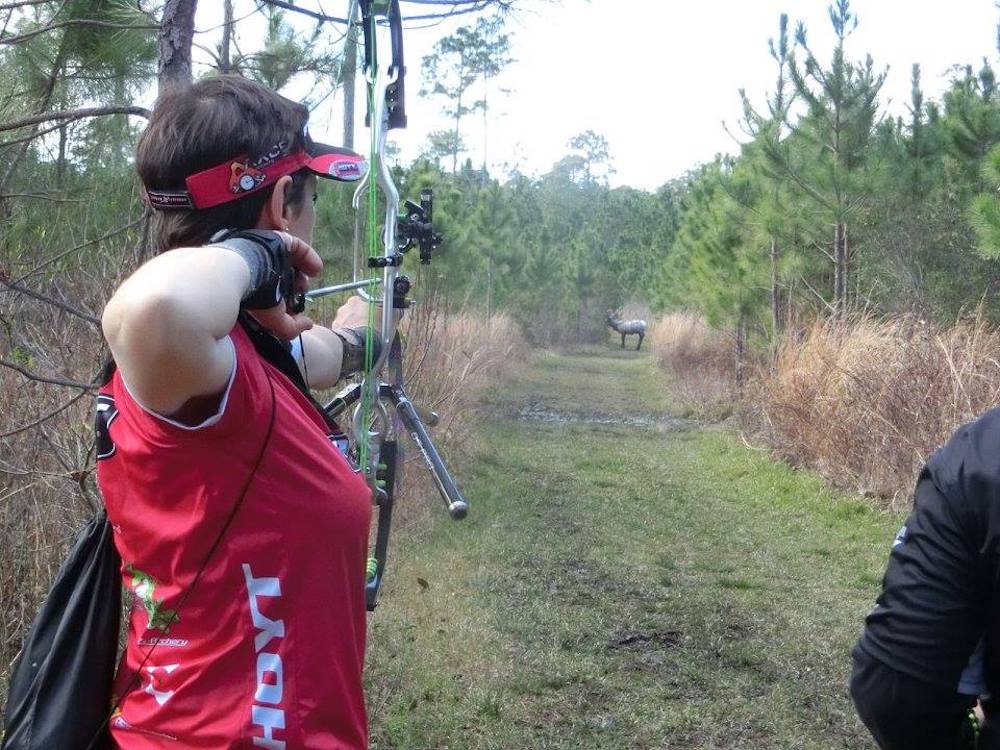
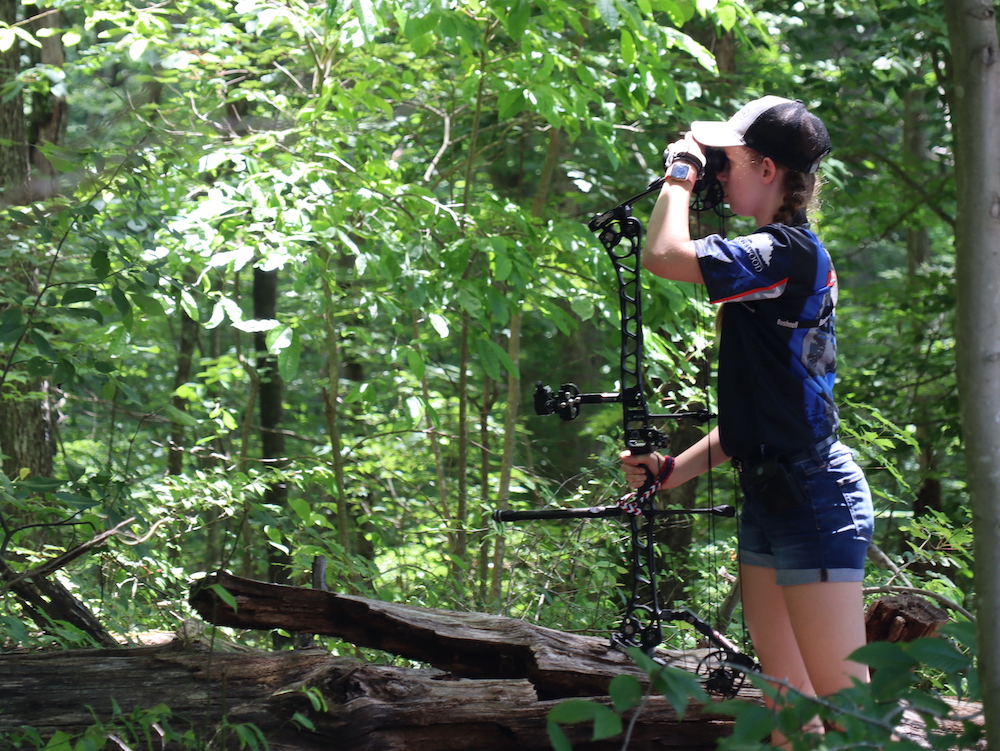
How to Shoot: 3D Archery
What is 3D archery? It’s a game played by walking a preset course — usually in the woods — and shooting at three-dimensional, foam animal targets at varying distances. Depending on the rules governing a particular shoot, those distances might be either known or unknown.
In the known game, rangefinders are allowed to measure the distance to a target. In the unknown game, it’s up to the archer to guess the distance, which adds an additional challenge.
For the most part, the maximum distance you’ll shoot in a 3D competition is 50 yards. There are divisions for kids, novices, barebow archers and Olympic recurve archers, however, that cap the shooting distance at 30, 40 or 45 yards. And then there are a few extreme-distance 3D shoots where archers might shoot out to 100 yards. We’ll stick to the 50-yard maximum shoots here.
The two primary 3D organizations in the U.S. are the Archery Shooters Association and the International Bowhunting Organization. Each has its rules and targets. ASA targets are all made by Delta McKenzie, and IBO targets are all made by Rinehart.
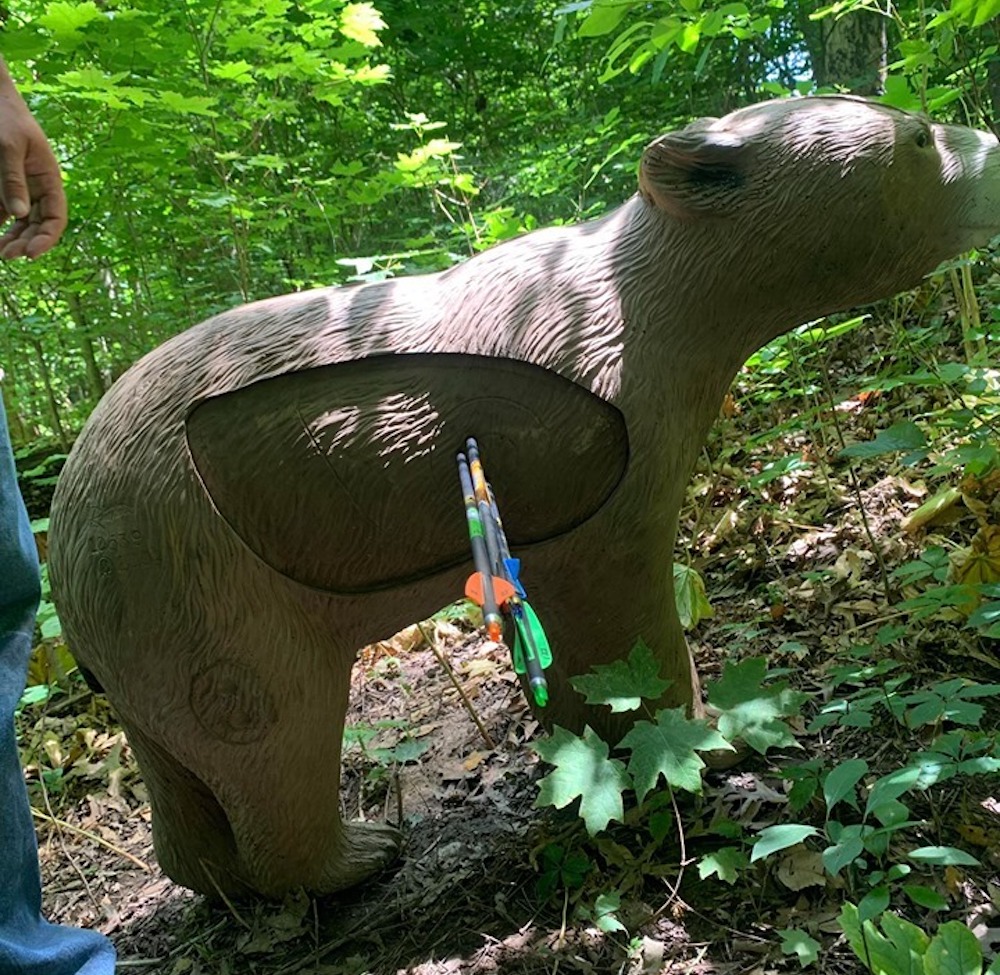
The targets imitate a variety of North American and African game animals. To name a few, you might see white-tailed deer, bears, bobcats, coyotes, Dall sheep, elk, leopards and alligators. One of the challenges is to identify precisely where the scoring rings are on each animal. Generally, they will be positioned where you’d expect to find the vital organs on the real animal the target is imitating. But the scoring rings are only etched into the target foam, rather than highlighted with a bright color, so they can be challenging to see in different lighting conditions.
In ASA scoring, a miss is worth zero points, a hit on the target body but outside the scoring rings is worth 5 points, and a hit within the largest, outermost scoring ring is worth 8 points. Within the 8-ring, a hit in the next-smaller ring is worth 10 points, and hits inside the two smallest rings within the 10-ring are worth 12 points. There are two 12-rings inside an ASA 10-ring. One sits high in the 10-ring, and the other sits low. The lower 12 is always in play, unless the archer calls for the upper 12. In that instance, only the upper 12 is worth 12 points.
Learn the differences between ASA and IBO 3D scoring. Photo Credit: IBO
In IBO scoring, you can earn 11, 10, 8, 5 or zero points. The rings and scoring match ASA until you get inside the 10-ring. On IBO targets, there is only one small ring inside the 10-ring, and it is positioned exactly in the middle of the 10. That ring is worth 11 points.
In ASA and IBO, the arrow only needs to touch a scoring ring to earn the points awarded by that ring. So an arrow can be almost entirely in the 8-ring but just touching the outer edge of the 10-ring, and that arrow would score a 10.
Just about any archery equipment can be used in ASA and IBO tournaments. The ASA has separate classes for archers shooting full target compound setups, bowhunting gear, barebow recurve, traditional recurve or Olympic recurve. IBO has the same, except for Olympic recurve, which could be used in the Bowhunter Open class.
The specific equipment rules for each organization by division vary. For ASA rules, click here. For IBO rules, click here.
Check the rules for the organization and your specific class before setting up your bow. Photo Credit: ASA
When setting up your gear specifically for 3D archery, there are a couple of key things to consider. There are arrow-speed restrictions that vary by division. You can find those in the organizations’ rules. But you’ll want to be sure your arrows are flying under the speed limit for your class.
To check your arrow speed, you’ll need to access a chronograph. If your arrows are too fast, you can slow them down by switching to heavier arrows, or by reducing the bow’s draw weight. To speed up the arrows, do the reverse.
You might consider setting up the largest-diameter arrows that you can effectively shoot from your bow. Across the board, the fattest arrows allowed by both ASA and IBO measure 27/64 inch, commonly known as 27-diameter arrows. Using the fattest arrows allowed increases the chance they’ll clip a scoring ring. But even more important than having fat arrows is being able to hit where you’re aiming. And the arrow that flies truest from your bow might be smaller than a 27-diameter. Testing with different arrows will let you know what works best.
Being able to see the targets clearly is a big part of 3D archery, since courses are typically wooded and can often require shooting in dark conditions. Archers who shoot peep sights will want to be sure the peep is large enough to let sufficient light get to their eyes. Yes, smaller peep apertures allow for more precise aiming, but they also require more light to be able to see the target clearly. Finding a balance is key for 3D archery.
Same goes for scope lenses in the classes that allow them. You need to find the magnification that lets you see the target in dark conditions and also magnifies it enough so you can pinpoint where the scoring rings are located. The higher the lens power, the darker the targets will appear.
Because courses are set in the outdoors, you need to be able to shoot in all conditions — rain, wind, heat, uphill, downhill, sidehill. Typically, the only weather element that postpones a 3D tournament is lightning. Anything else, and it’s game on. You need to know how you and your equipment perform in various conditions and terrains.
ASA has divisions where target distances are both known and unknown. IBO offers only unknown-distance shooting.
Archers are allowed to use a rangefinder in the known-distance category. Photo credit: ATA
In known-distance 3D archery, having a good rangefinder that accounts for uphill and downhill angles is critical. Such rangefinders will calculate cuts — yardage reductions — when shooting at an angle, which enables you to adjust your sight, or gauge your aiming point, accordingly.
In unknown 3D, you have to develop the skill of judging distance. Some archers look at the ground and visually map out incremental distances to a target. Some archers just look at the target and gauge distance by how big or small it looks. Some archers do both. The point is, spend at least as much time practicing judging distance as you do shooting your bow.
Carry a rangefinder with you all the time and guess the distance to things you encounter, then use the rangefinder to check your accuracy. Over time, you will improve your ranging skills.
Getting involved in 3D archery can be as simple or as complex as you want. You can shoot for fun, for hunting practice or as a serious competitor. Give it a try this weekend at a club near you.
10 Things You Should Know Before Shooting Your First Arrow
Archery is one of the safest sports. But that doesn’t mean it’s completely without risk. Before shooting your first arrow of the day, it’s important to follow a few steps to make sure you’re doing it properly.
Never Draw Without an Arrow
This might seem obvious, but it happens more than you’d think. Shooting a bow without an arrow nocked on the bowstring is called a dry-fire. It can happen when people aren’t paying attention or don’t understand the necessity of having an arrow in place to absorb the energy produced by the bow.
When the archer releases the bowstring, the bow’s limbs spring back into place and convert stored power into kinetic energy to propel the arrow into flight. Without an arrow to absorb all this energy, it goes back into the bow, which isn’t designed to absorb the power. This sends an explosion through the bow that is loud and potentially dangerous. The vibrations can damage the equipment and send parts flying. Before drawing any bow, always make sure there’s an arrow nocked properly.
Inspect Each Arrow Before Every Shot
Inspect each arrow for damage before every shot. This might seem redundant but it’s important. Arrows carry a lot of energy, and shooting a damaged arrow is unsafe. There are many ways an arrow can become damaged, and it’s not always obvious at first glance.
Perform a flex test on the arrow. Hold it on both ends and flex it away from your body. Look and listen for dents, nicks, cracks and splinters. If you see or hear any damage to the spine, get rid of the arrow because it can’t be fixed.
Nocks and fletchings can also become damaged, especially when arrows are grouped tightly. Luckily, if nocks or fletchings become loose or damaged, these can easily be replaced. Just set the arrow aside until it’s fixed.
Nock the Arrow Properly
Failing to properly nock the arrow on the string can cause the arrow to fall off as the archer draws back. This can result in a dry-fire. When you nock an arrow, you should hear it click onto the string. It’s important to have the right nock fit. If it’s too tight, the arrow won’t release smoothly from the string; but if it’s too loose, it might fall off while drawing. You also need to make sure that the odd vane is facing up. This will ensure that the arrow clears the rest. Your local archery shopcan give you expert advice on the fit and adjust things if necessary.
Set Your Stance
The form of your foundation rests on your stance. Setting your stance is the first step in the shooting process. It’s easy to get lazy about stance, especially when you’re shooting several rounds of arrows. But before every arrow, it’s important to check your stance. There isn’t one correct way to stand while shooting. However, once you find a stance that works well for you, do it every time. If you need help with your form, schedule an archery lesson with an instructor. You can find one near you by clicking here.
Align Your Peep Sight
Compound bows have peep sights. However, a common mistake some beginning archers make is to look around or over their peep sight, rather than through it. While aiming, the peep sight and the sight housing need to create two concentric circles. If the two aren’t in the same alignment for every shot, this will create inconsistent shooting.
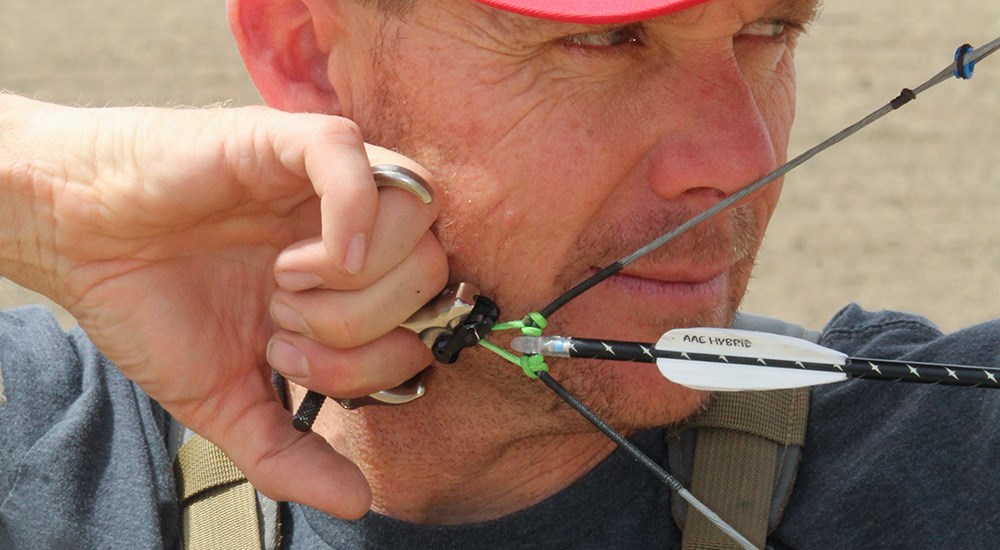
Create Consistent Anchor Points
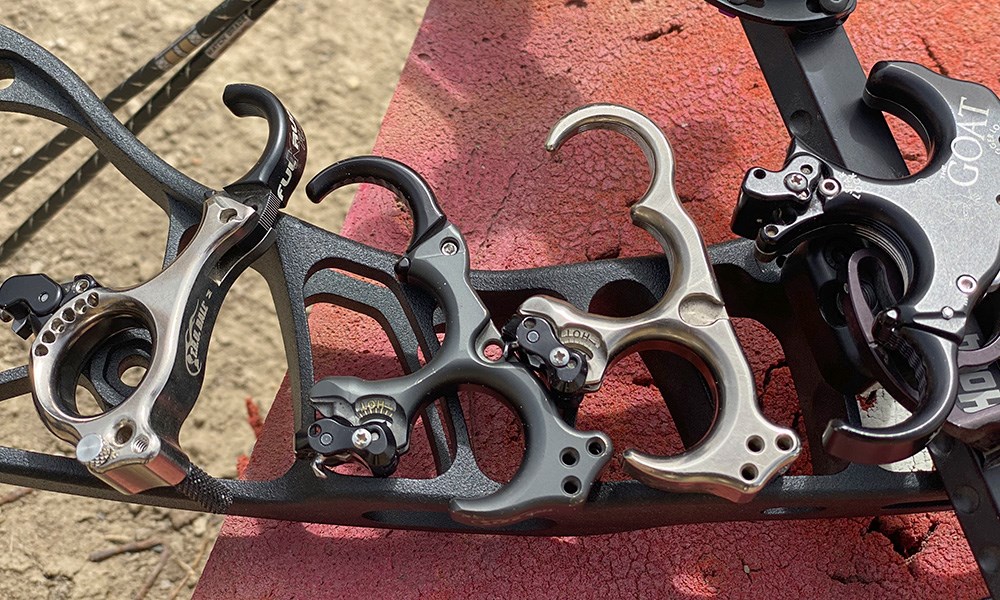
Anchoring is how you position your draw hand as you pull back the bowstring. Your anchor points are certain parts of your body that touch the string every time you draw. Consistent anchor points are critical for good shooting. Even small changes in the way you anchor can make a big difference in where the arrow hits the target.
Anchor points differ between archers. Some archers attach a kisser button, made of soft plastic, to the string so it touches the corner of the mouth. Or it might be a finger against the side of the jawbone or just below the ear. Your anchor point should be a spot on the face that’s comfortable to come back to every time.
Get a Grip
Many beginning archers think they need to grasp the bow tightly to keep it from falling forward. However, the tighter you grip the bow, the more likely you are to torque it. Torquing the bow allows it to twist side to side. This causes arrows to fly off course. A good grip is a loose grip because it reduces torque.
Bend Your Bow Arm
Most archers have slapped themselves in the arm with a bowstring at least once. This leads to a bruised ego, in addition to a bruised forearm. This happens when archers get sloppy with their form or have ill-fitting equipment.
The elbow on your bow arm should point at an outward and slightly downward angle, away from the bow. This gives the bow arm a slight bend. If the bow arm’s elbow faces directly downward, it can cause the bowstring to slap your forearm during the shot.
Squeeze Slowly
Most archers have heard of “punching” the trigger on the release aid. That means to release the trigger in a swift and rapid motion. This isn’t ideal. Many archers don’t even know they’re doing it because it’s an easy habit to acquire and can provide decent accuracy. But punching the trigger can also cause target panic, a psychological condition that affects an archer’s ability to shoot.
To avoid punching the trigger, place your finger on the trigger and slowly apply pressure. The trick is to train the brain to understand you can touch the trigger without it going off. The goal is to apply steady pressure once you’re ready to shoot and let the release surprise you.
Start Short
Set up at a target that’s 10 yards away for your first arrow of the day. Go through the proper shooting steps before releasing the arrow. Check where it hit the target and adjust your sight accordingly. By starting at a short distance, most archers will be less nervous about the arrow’s hitting the target and more focused on everything covered above. A good first arrow can help the archer move confidently into practice for the day.
There’s a lot more that goes into archery than sending arrows toward the target. By implementing these measures into your practice, you’ll create consistency and make sure your gear remains in tiptop shape.
How to Become a Better Bow Shot
byJace Bauserman
posted on July 6, 2022
Have you ever uttered the phrase “next year will be different”? If so, you’re not alone. Many bowhunters, myself included, have spoken these somber words. Most of the time, they come on the heels of a bad season—one plagued by errant arrows or worse, wounded game.
Here’s the cold hard truth: Bowhunting is challenging. Sending slim shafts through the air from a vertical rig—no matter how awesome the rig or its accessories—and putting those shafts on the mark takes discipline and dedication. If you’ve vowed to make next fall your best bowhunting season yet, and want to walk the walk, here’s what to do.
Let the Release Fire the Bow As much as you love your index- or thumb-button release, it may be time to switch. As good as modern-day index- and thumb-button releases are, they make trigger manipulation too easy, and if you’re struggling to let your release fire your bow, they aren’t for you.
The difference between putting a hole in a critter’s lungs and a sob story is often three or four seconds. Having the ability to control and trust your pin float as your aiming points dance on the animal’s side is paramount. The problem for many bowhunters is that when your pin hits hide, no matter where on that hide it hits, the release gets punched and the arrow is on its way. Sound familiar?
Making the switch to a hinge (back-tension) or tension release is the first step to giving up trigger control and letting the release fire the bow. If you are used to a trigger release, this new system will feel awkward at first, but you must trust the process. If you’re worried about punching yourself in the nose while trying to get a hinge back or having that hinge go off before you settle into anchor, consider a tension release with a safety.
When learning to shoot a hinge or tension release, the last thing you want to do is to focus on accuracy. To get comfortable, you need to start with the basics. Once you’ve read the user manual, it’s time to start shooting. Set a blank target at a distance of 5 yards. If there are aiming points on your target, cover them up. A blank target will help you relax and focus on the fundamentals of getting into your grip, hooking up your release, pulling the bow back smoothly, crawling into your anchor and letting your pin float on a blank-face target.
There is no button to push or trigger to squeeze with a pure hinge or a tension release. Instead, the release fires itself. This forces you to let your pin float on a target face while pushing your bow hand into the target and driving your release arm back while relaxing the release hand from the wrist down. You want to be strong in the front and strong in the back, but you don’t want to squeeze the life out of the release. As you drive your bow arm into the target and your release elbow back and relax the release hand, the bow will go off. When it does, it will shock you. This is a good thing and the first step to letting the release fire the bow.
Stay Blank Shoot like this daily for two weeks, and don’t cheat—you won’t be doing yourself any favors, I promise. During this time you will be perfecting your grip, draw, anchor and release. You want to master the art of letting the release fire the bow, training your mind not to anticipate the shot. The goal is to let your pin float while you focus on aiming, until the bow goes off. Practicing at 5 yards on a blank target is the best way to learn and trust this process.
Have your wife, friend, child or nosy neighbor film your shot process several times over the ensuing two weeks. When watching the video playback, look for flaws in your form and pay special attention to your follow-through. If you’re not anticipating the shot, when the release breaks, the bow should fall forward and left for right-handed shooters, and the release arm should shoot backward. You should look strong throughout the process, and when the shot happens, you should blow apart.
After two weeks at 5 yards, it’s time to move the target back. Spend week three shooting your blank target at distances of 20, 30, 40 and 50 yards—no farther. You’ll need to make some sight adjustments to ensure you’re hitting your target and not losing arrows, but you don’t need perfection at this point, because you’re aiming at center mass. If with each shot your arrows are hitting foam, your pins or sight tape (if you shoot a moveable, single-pin sight), will be close enough for the time being.
Nothing about your technique should change as distance increases. Your form stays the same, focusing on the act of aiming until an arrow replaces the spot where your pin is floating. Also, pull each shaft from the target as you shoot. If you don’t, your subconscious mind will focus on the nock and vanes.
Only 3D, Please For weeks four and five, you’ll be switching to 3D targets or 2D life-like animal targets. Why? Aside from hard-to-distinguish scoring rings, which you need to ignore, these targets generally have no specific aiming points, except for the natural points we all look for. From distances of 20 to 50 yards, focus on your shot process and try to put your arrows in the lungs of the target. You want to get comfortable shooting at a target that has blank space over its back and under its belly.
Double Distance Practice Weeks six through eight are pure fun. Your confidence is soaring, and you’re feeling very lethal. Now is the time to get your pins or sight tape dialed-in by shooting spots and dots. If you start to feel anxiety at any point during this process, stop! Move back to 5 yards and spend a day or three blank-bale shooting.
Start double-distance practice once you have your pins dialed or your sight tape set—I prefer a sight tape and dial setup on a vertical single- or multi-pin sight.
The process is simple. If your max hunting distance is 40 yards, spend 70 percent of your week six-through-eight sessions shooting at 80 yards. If 60 yards is your max hunt distance, your shooting should be done at 120 yards. I know this sounds intimidating, but you’re ready, and the shot you make at 20 yards is the same as that at 120 yards. Doing this will hone your archery skill like nothing else, and 50 yards will feel like a chip shot. Be sure to do this at an outdoor range where large bale targets are used.
I realize some of you just read that last paragraph and choked. You may not have a single- or multi-pin sight with a distance dial. Don’t fret. If you shoot a fixed, three-pin sight set at 20, 30 and 40 yards, there is a way to practice at 80 yards. From 80 yards, draw your bow and put your 40-yard pin on the target. Next, glance up at where your 20-yard pin is floating and take note. Now use a little Kentucky windage to place your 40-yard pin where your 20-yard pin was floating. Your 40-yard pin will now be a 70-to-80-yard pin. It’s that easy. Remember, you’re not busting lungs or shooting 10-rings here, but rather focusing on aiming and executing a perfect shot.
There you go, an eight-week program that will make this coming fall your best.

 These elements make recurve bows better for quick follow-up shots than compound bows, but they’ll have lower overall draw weights and energy, generally speaking. Compound bows also feature sight systems, typically using a front pin sight mounted to the main body of the bow, called a “riser”. Within the riser, above the grip, is an area called the sight window, where the pin sight is mounted. The rear sight is called a “peep sight”, which is a small aperture tied into the bowstring itself. It isn’t common to see recurve bows with sighting systems like this. Instead, if a sight is used (usually in competition), it is mounted in the sight window, but there is no peep sight. Most of the time you’ll see recurve archers going “barebow”: no sights, stabilizers, or other modern attachments. Barebow is the most primitive type of archery, practiced for the extra challenge presented by forgoing modern technological developments.
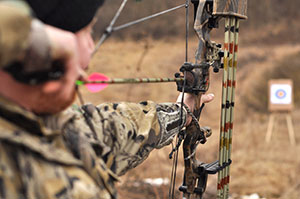 You may run across someone hunting with a recurve bow, but it’s far more common to see bowhunters using compound bows due to the ease of use and increase in power. With the additional power, easy let-off, and sights, it’s much easier to hunt. This is because you can take the time to line up your shot, and be assured that the arrow will travel with more speed and power, ensuring an ethical kill.
 Figuring out your dominant eye is very easy. Put both of your hands together and make a triangle with your thumbs and index fingers (as pictured). Look through this hand-triangle at a distant object, even 10 feet will work well. Focus on the object with both eyes open, then close your right eye. If the object jumps out of view, you’re right eye dominant. If the object stays in place, you’re left eye dominant. Try it again but close your left eye to double-check.
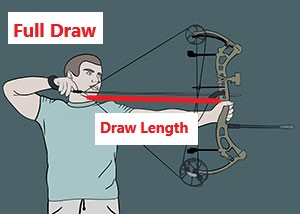 Draw length is generally easier to determine than draw weight and is based on the archer’s physical upper-body dimensions. Your approximate draw length is measured by taking your full wingspan (arms outstretched and going from fingertip to fingertip) and dividing that by 2.5. This refers to the distance between the grip and the string when at a full draw.